Nose Section Sheet Metal Panels/Skin
In this month’s entry I detail the fitting of the Viper nose section sheet metal panels or skin.
For me, this is make or break time. As a proof of concept, the completion of the nose section hinges on how well the sheet metal panelling/skin turns out. If it is successful and appears as I have envisioned (remembering that my vision is based on the WW2 warbird costruction techniques of the Spitfire, Corsair, Mustang, etc), then in my mind, it green lights the rest of the project. It will prove to me that the design and construction techniques I have employed for the nosed section can deliver the desired results for the remainder of the airframe.
If the panels/skin doesn’t work as planned, then it’s pretty much back to the drawing board for the entire project. Given the time I’ve already invested in the project (estimated at 150 to 200 hours), then I’m not sure I’d be prepared to start all over again.
So here we go, here’s what I’ve done.
I firstly etch primed and painted the nosed section frames/bulkheads and stringers. I’m not sure this is absolutely necessary on an aluminium airframe construction, but I figured better to provide as much anti-corrosion protection as possible.

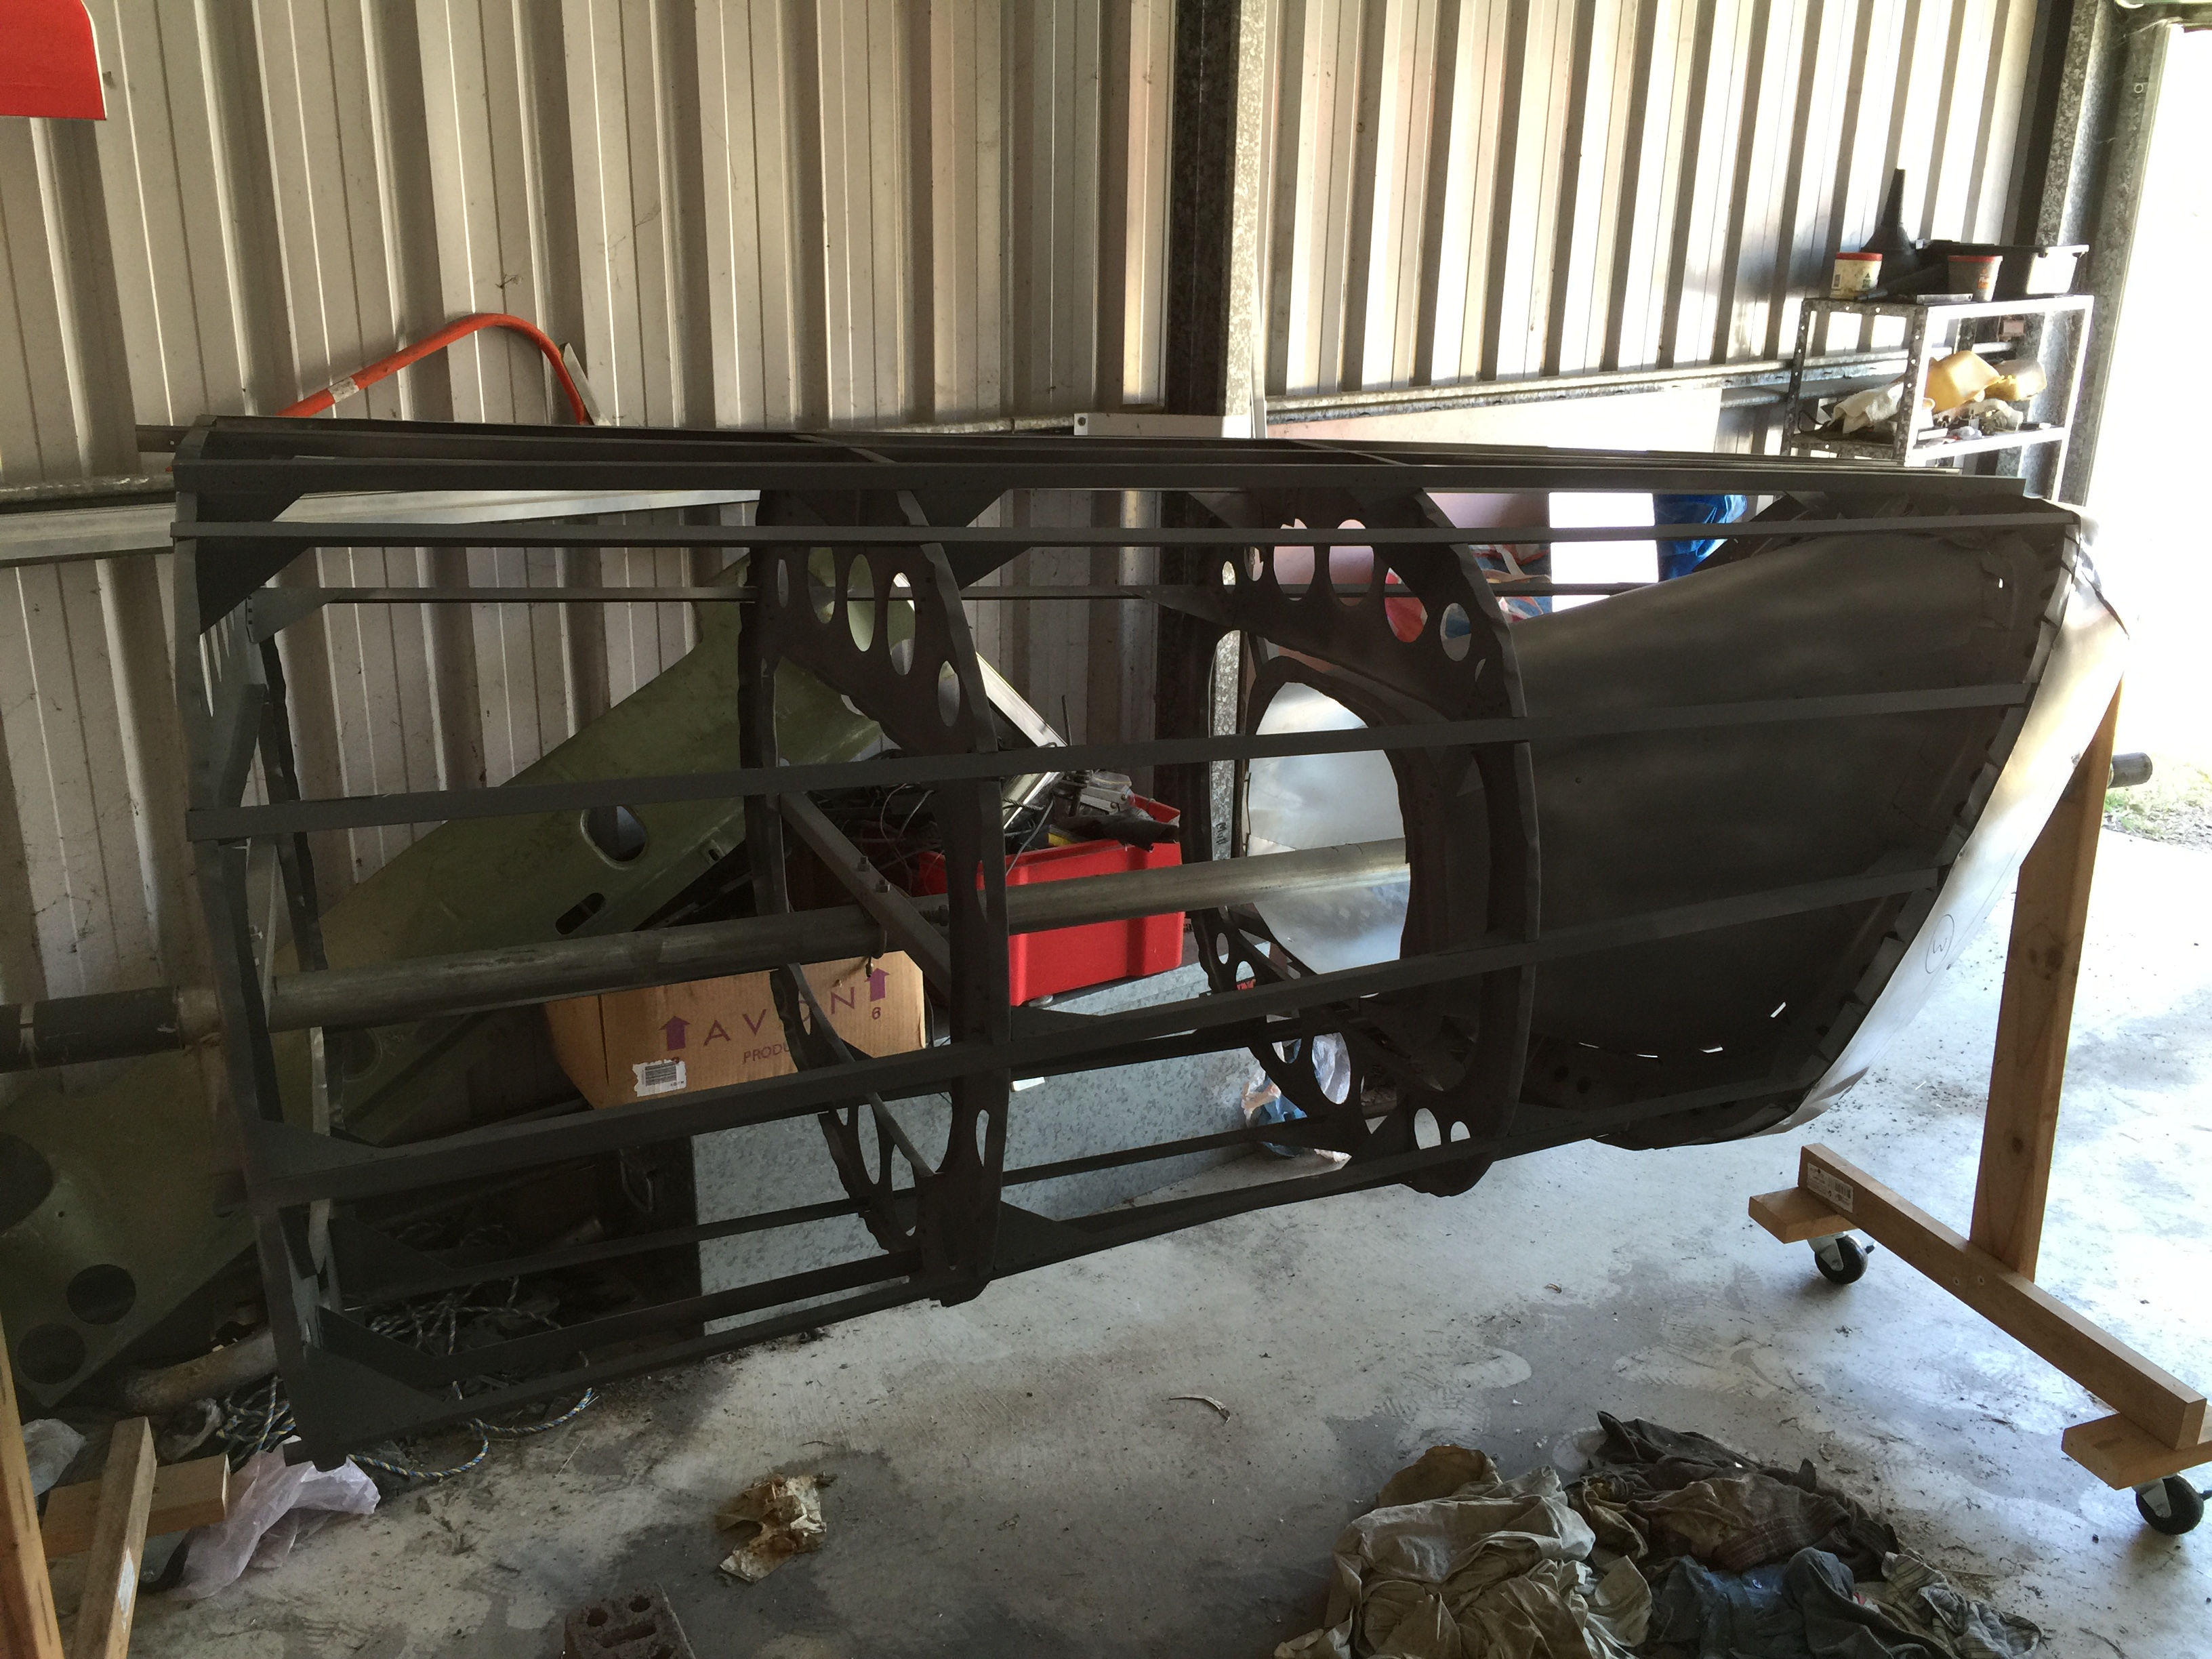

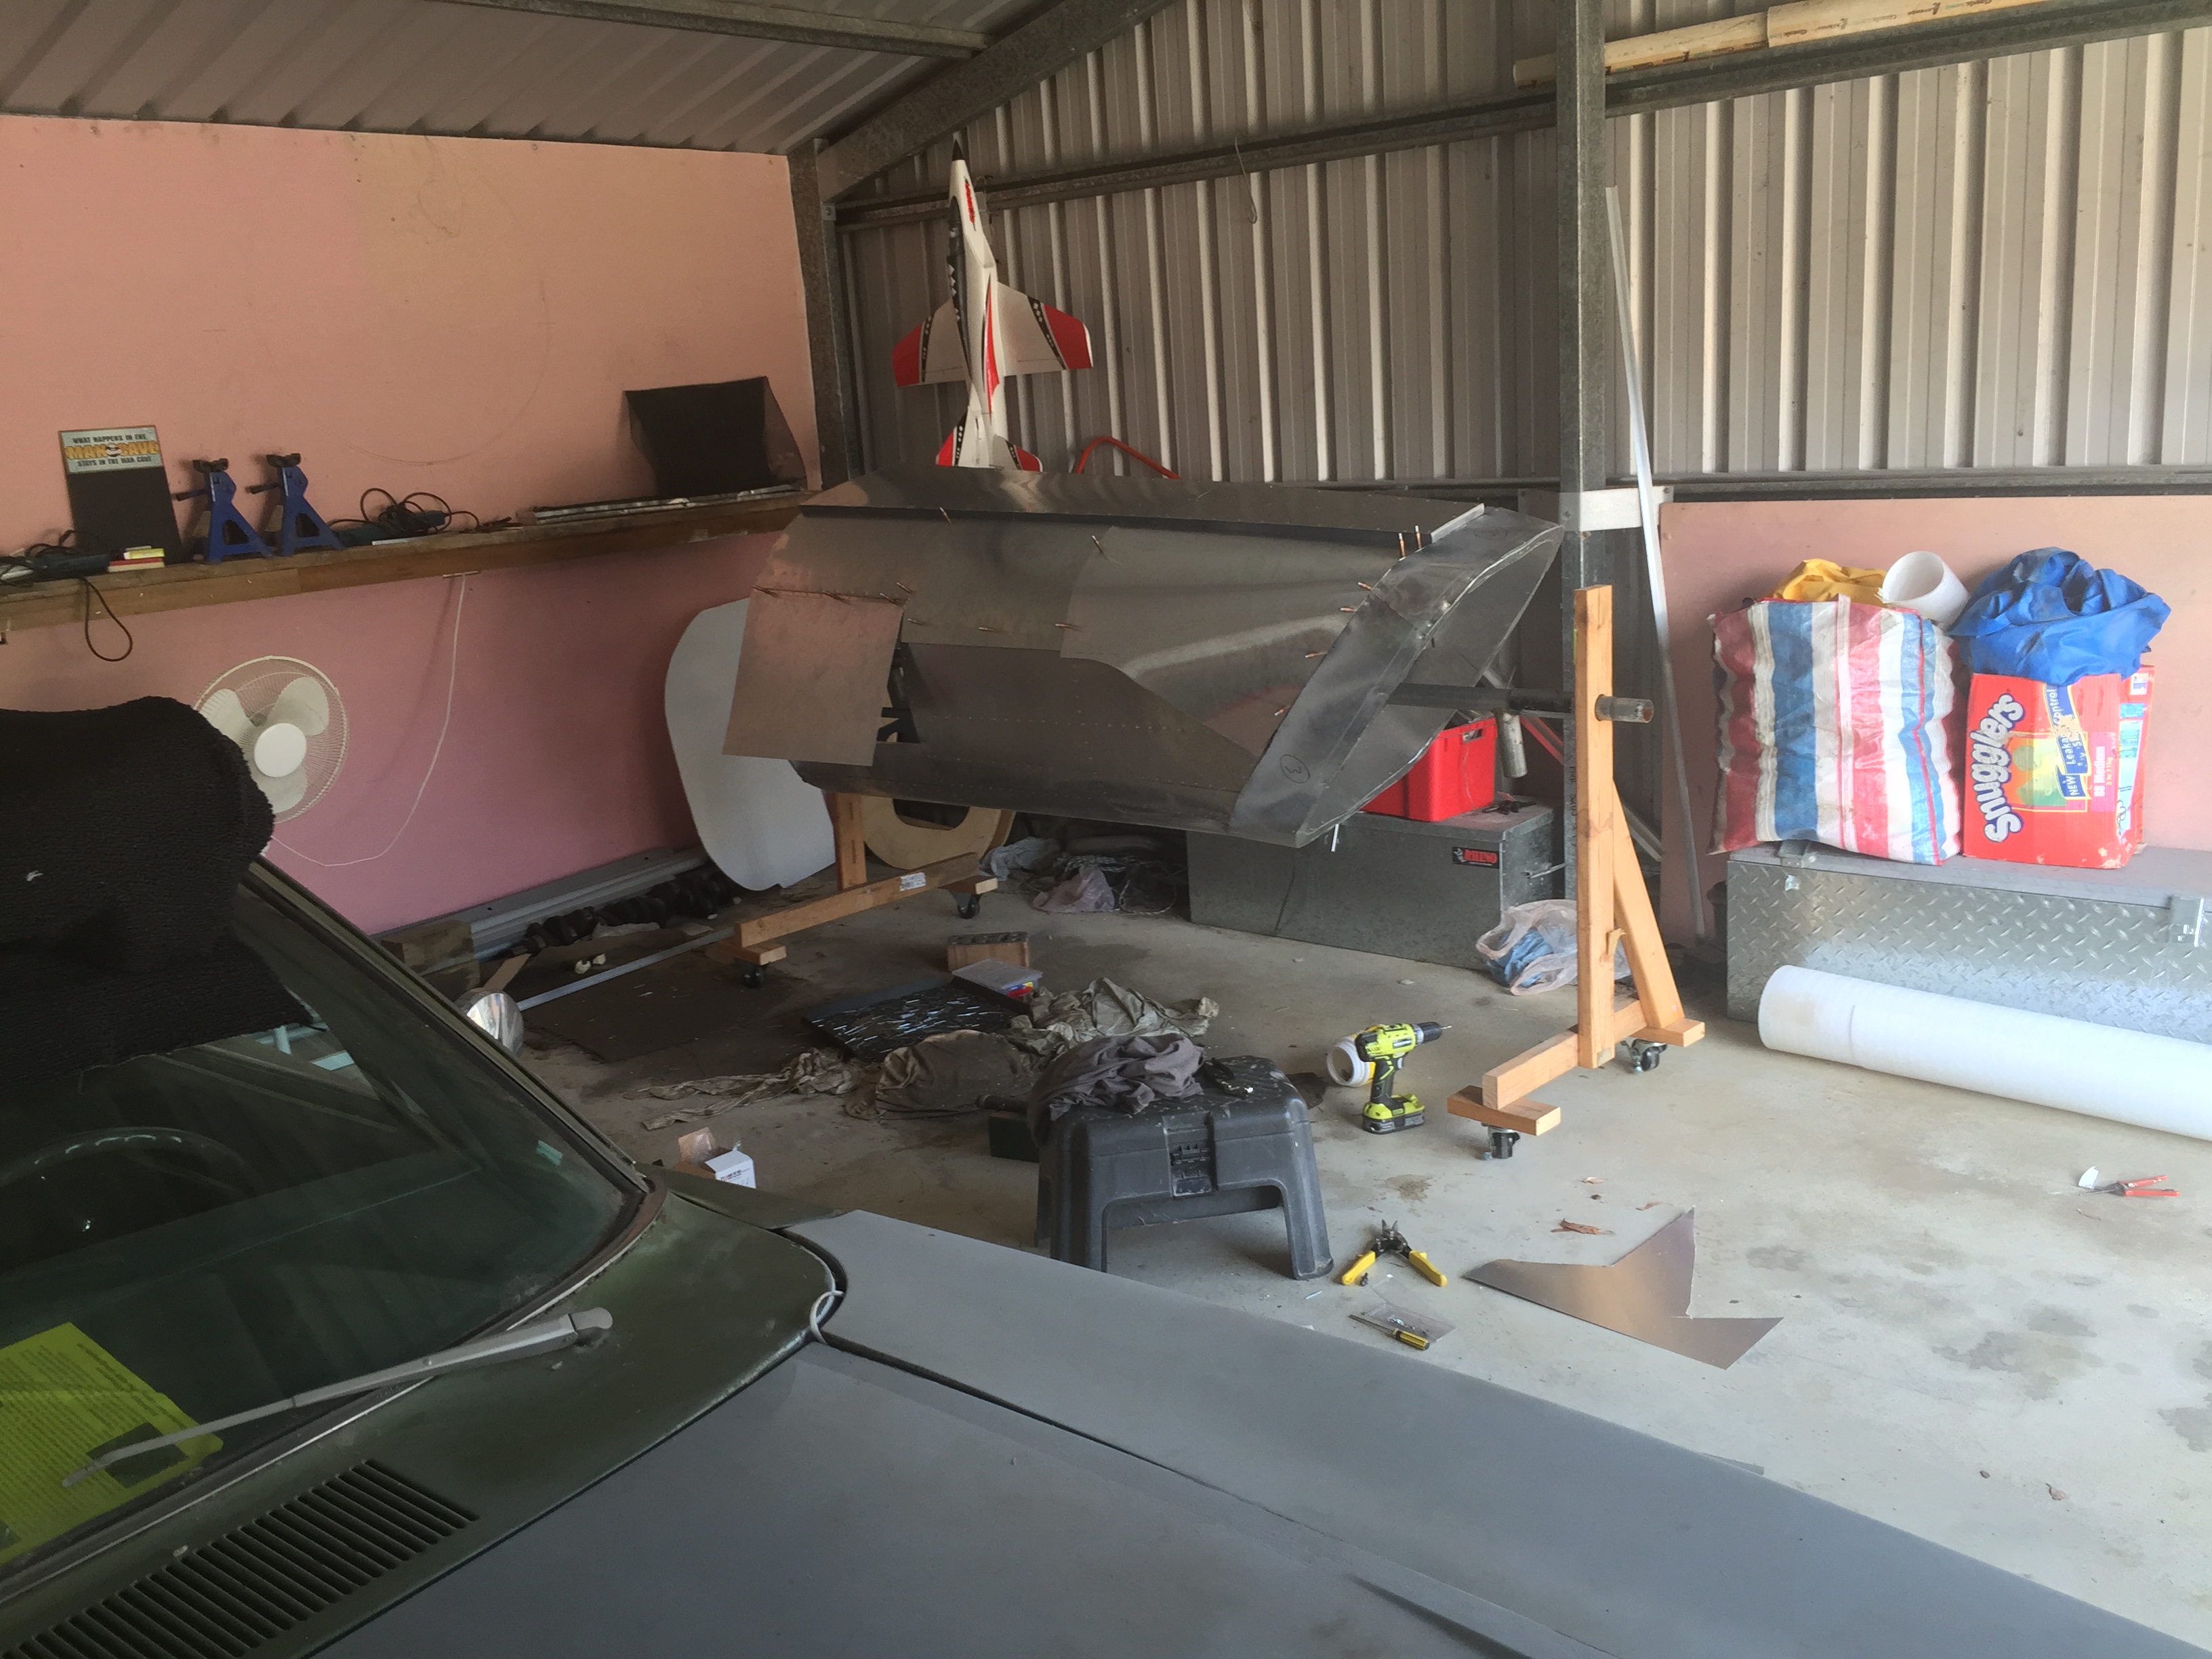
I then begain the fitting of the panel/skin to the top, relatively flat section of the nose. Better to start simple and work my way up to some of the more complicated curved sections. I used 1.0mm aluminium sheet for this part of the skin. Cleco’s were used to hold the panel in place while all holes were drilled. The holes in the sheet panel were dimpled and all stringer\bulkhead frame holes countersunk. The panel skin was then attached with countersunk aluminium pop rivets.


My aim is to replicate the panel lines of the original design as best I can. I’ve elected to use the panel lines on the Moebius 1/32 Classic Viper model as my guide. It’s a very good replica by all accounts and it is relatively easy to measure and scale up the individual panels on the model.
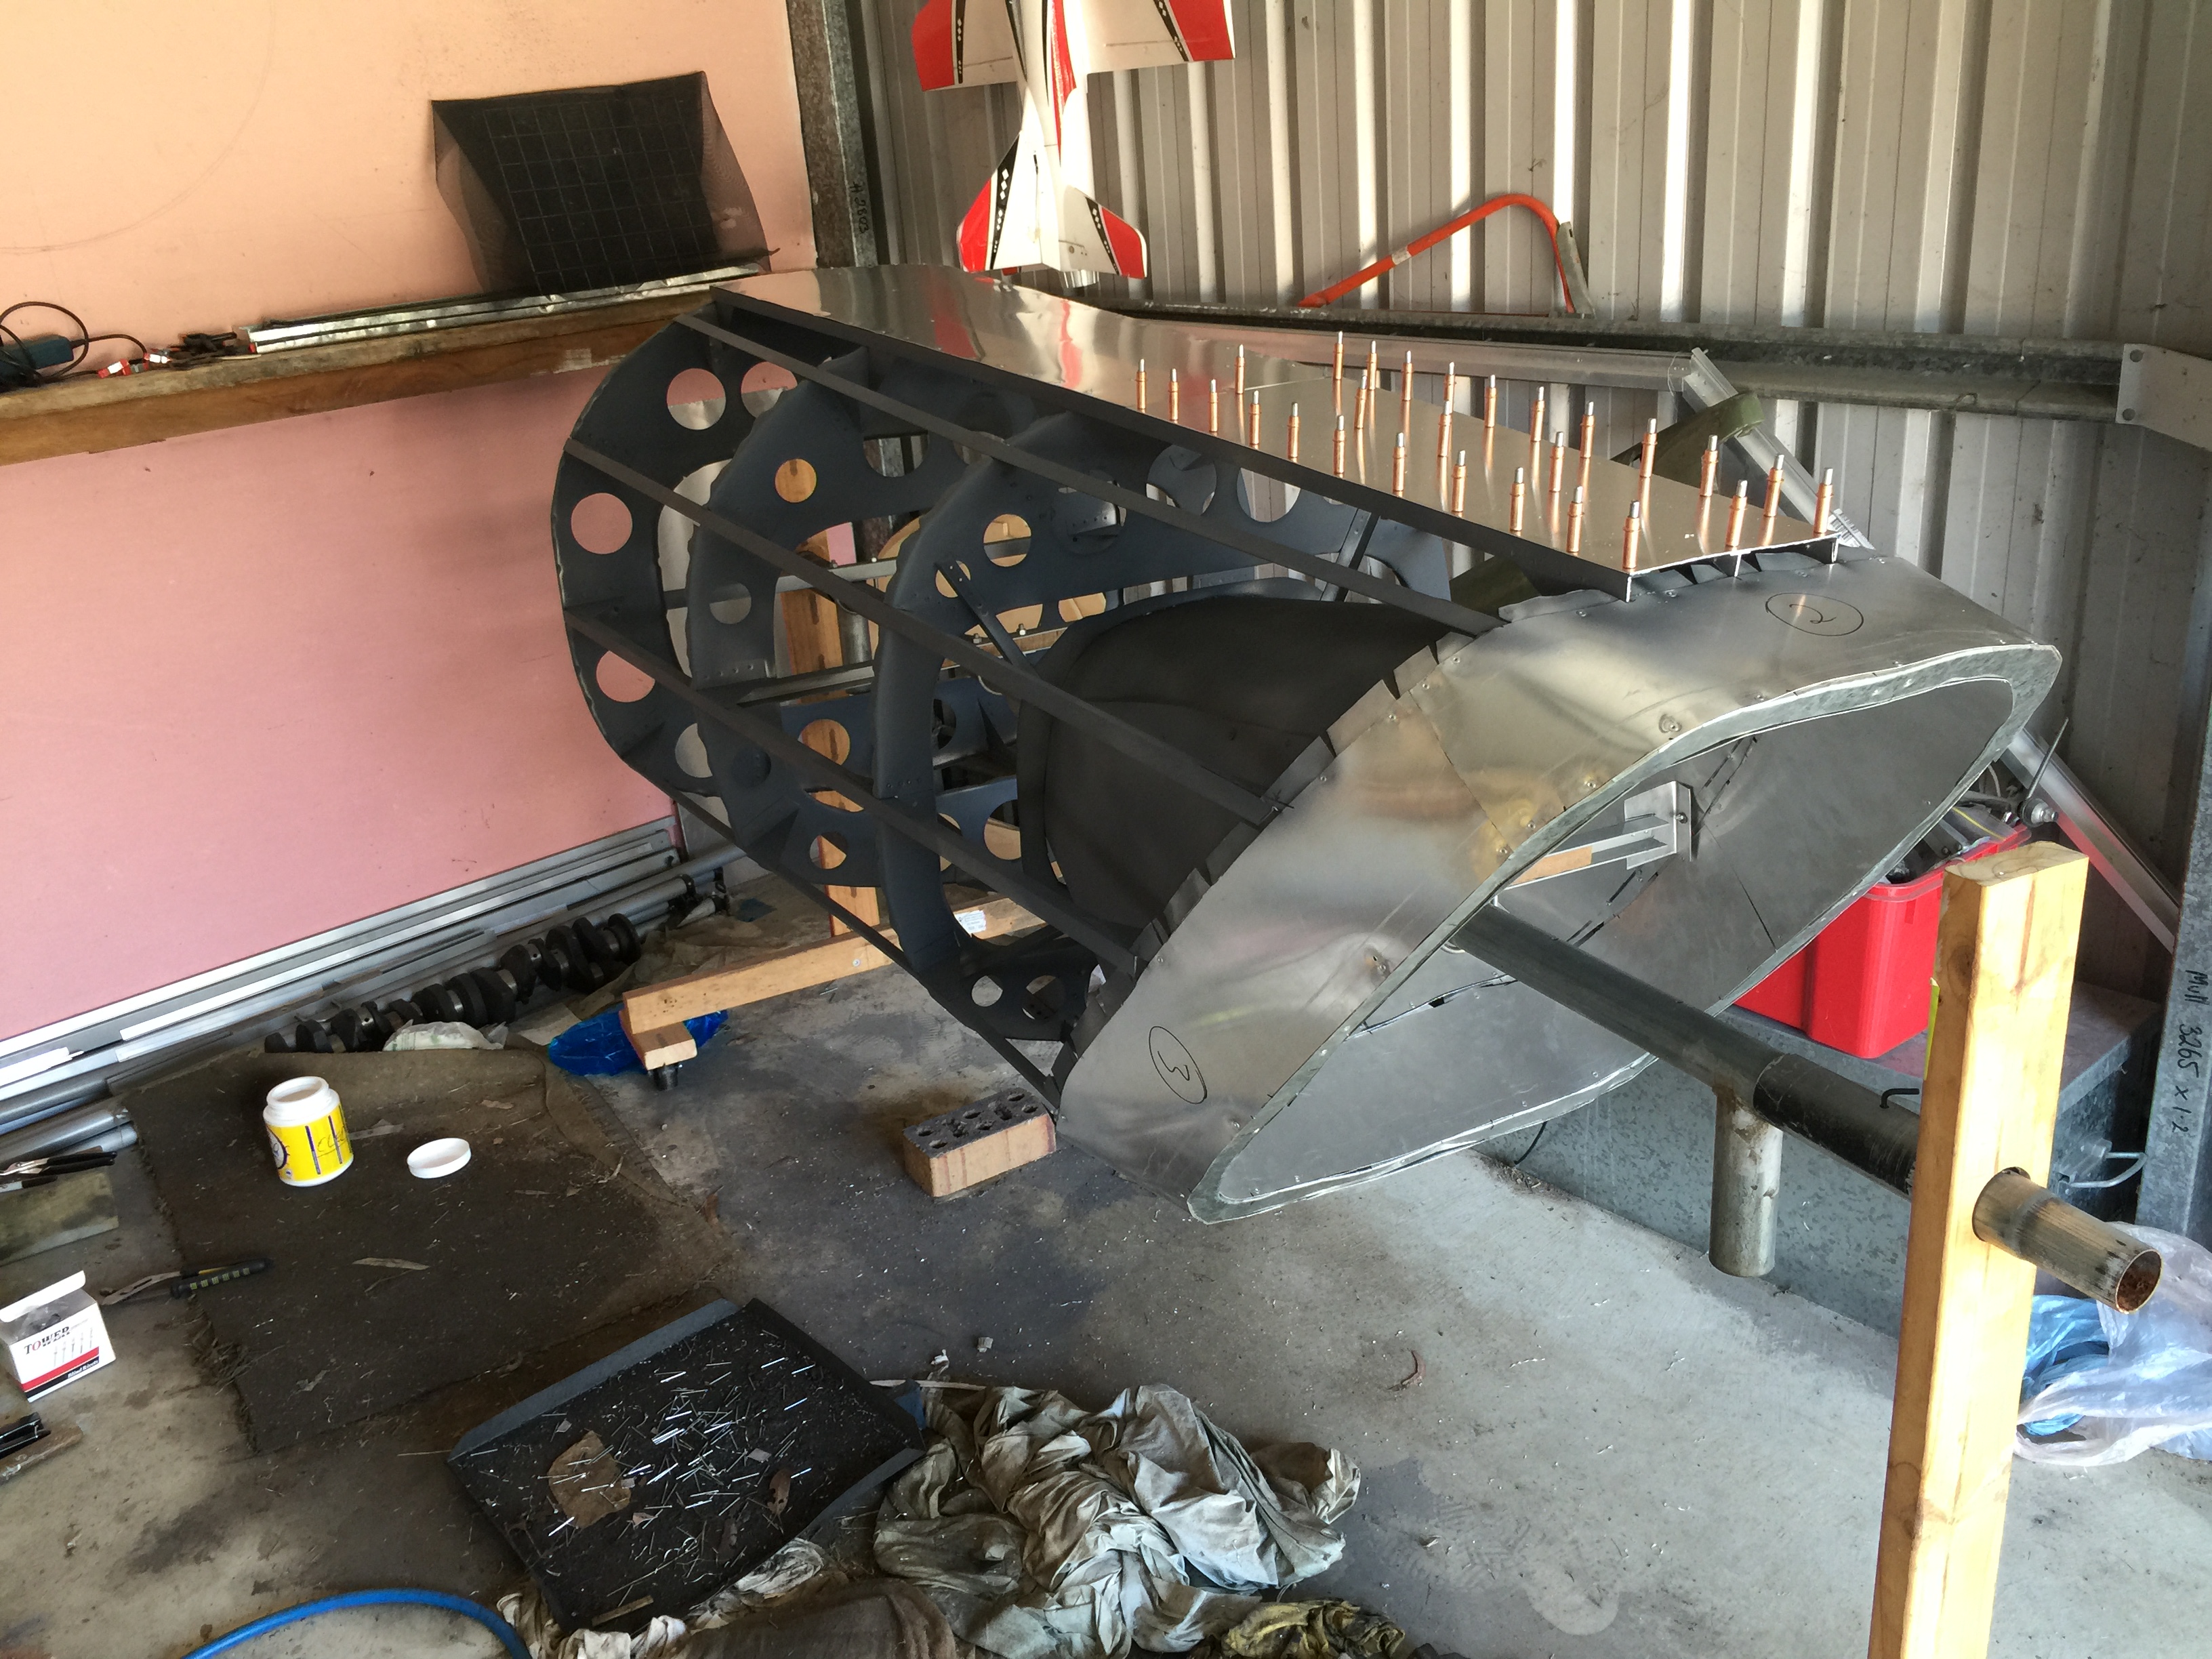
I then started on the bottom panel, using the same method for alignment and attachment, but using 0.6mm sheet aluminium. For this panel, however, I left the outermost seam unattached, to allow overlap of the other panels.

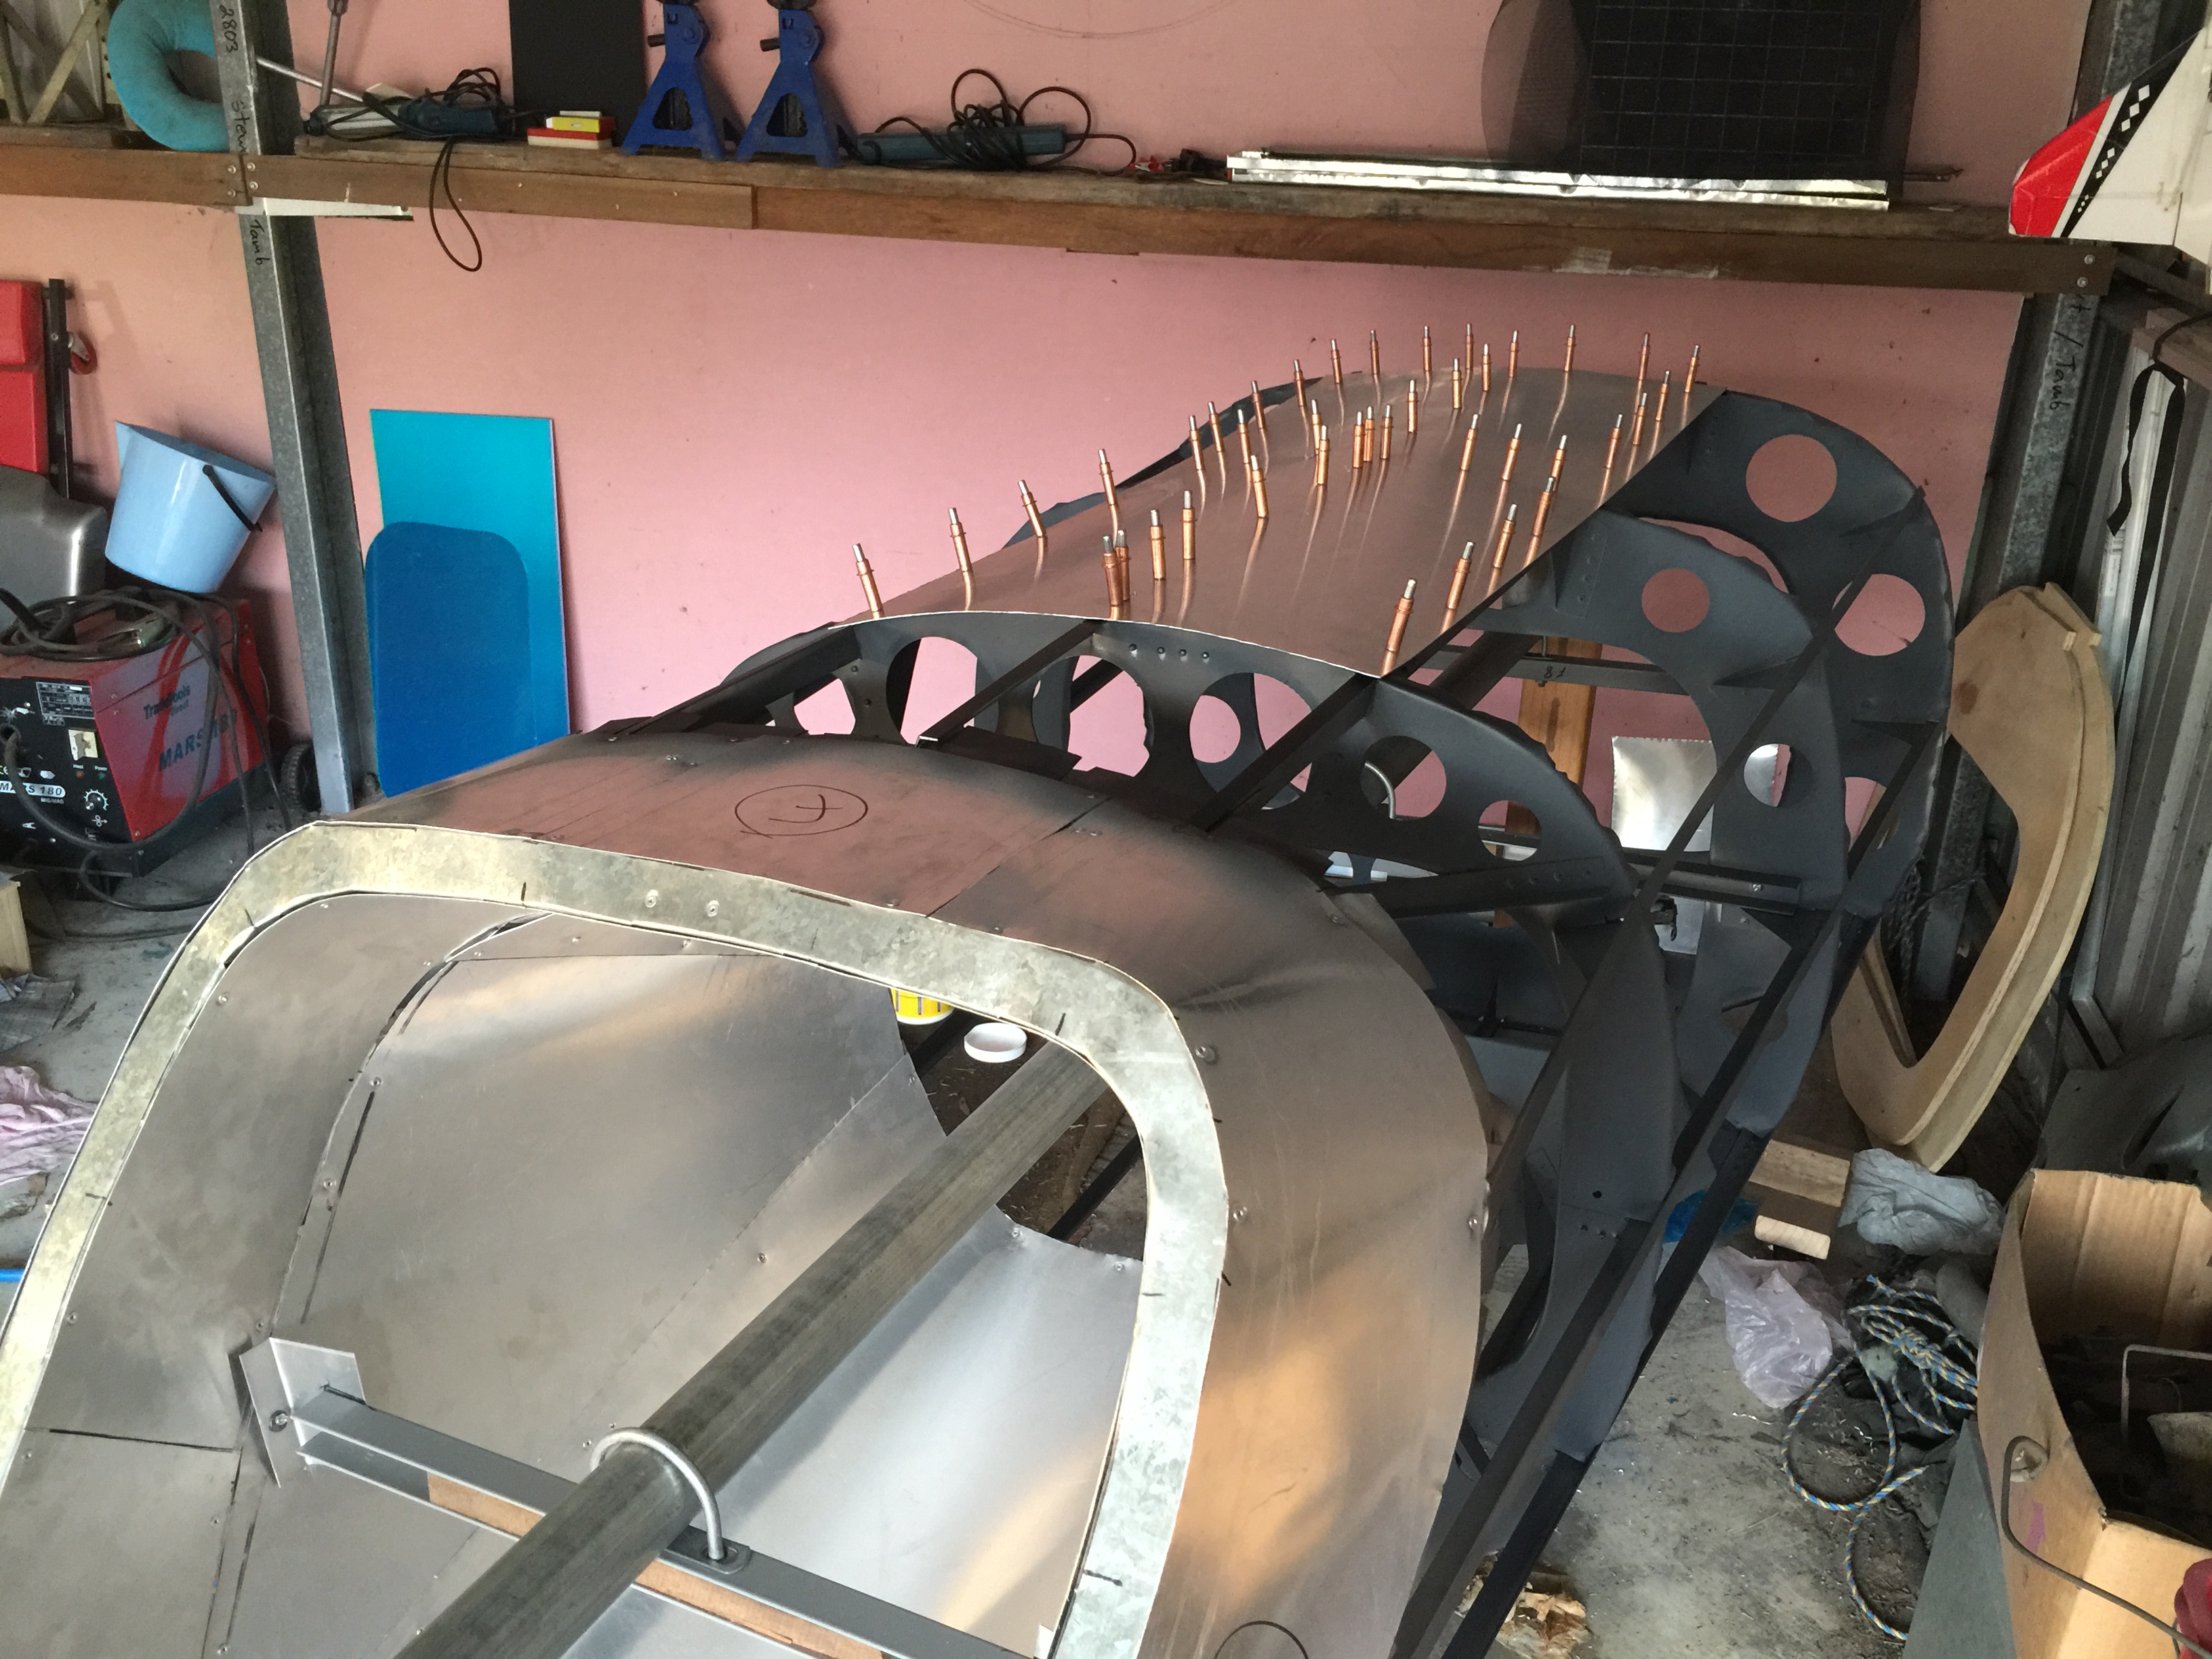

With top and bottom attached, I then started on the right hand side panels. The pictured panel appeared to be the least complex in terms of curved profile and it also forms the central panel from which all the other side panels can be designed and positioned.


Then the inter connecting panels to for the skin between the side panel and the bottom panel were sized, cut out and fitted, all from 0.6mm sheet.


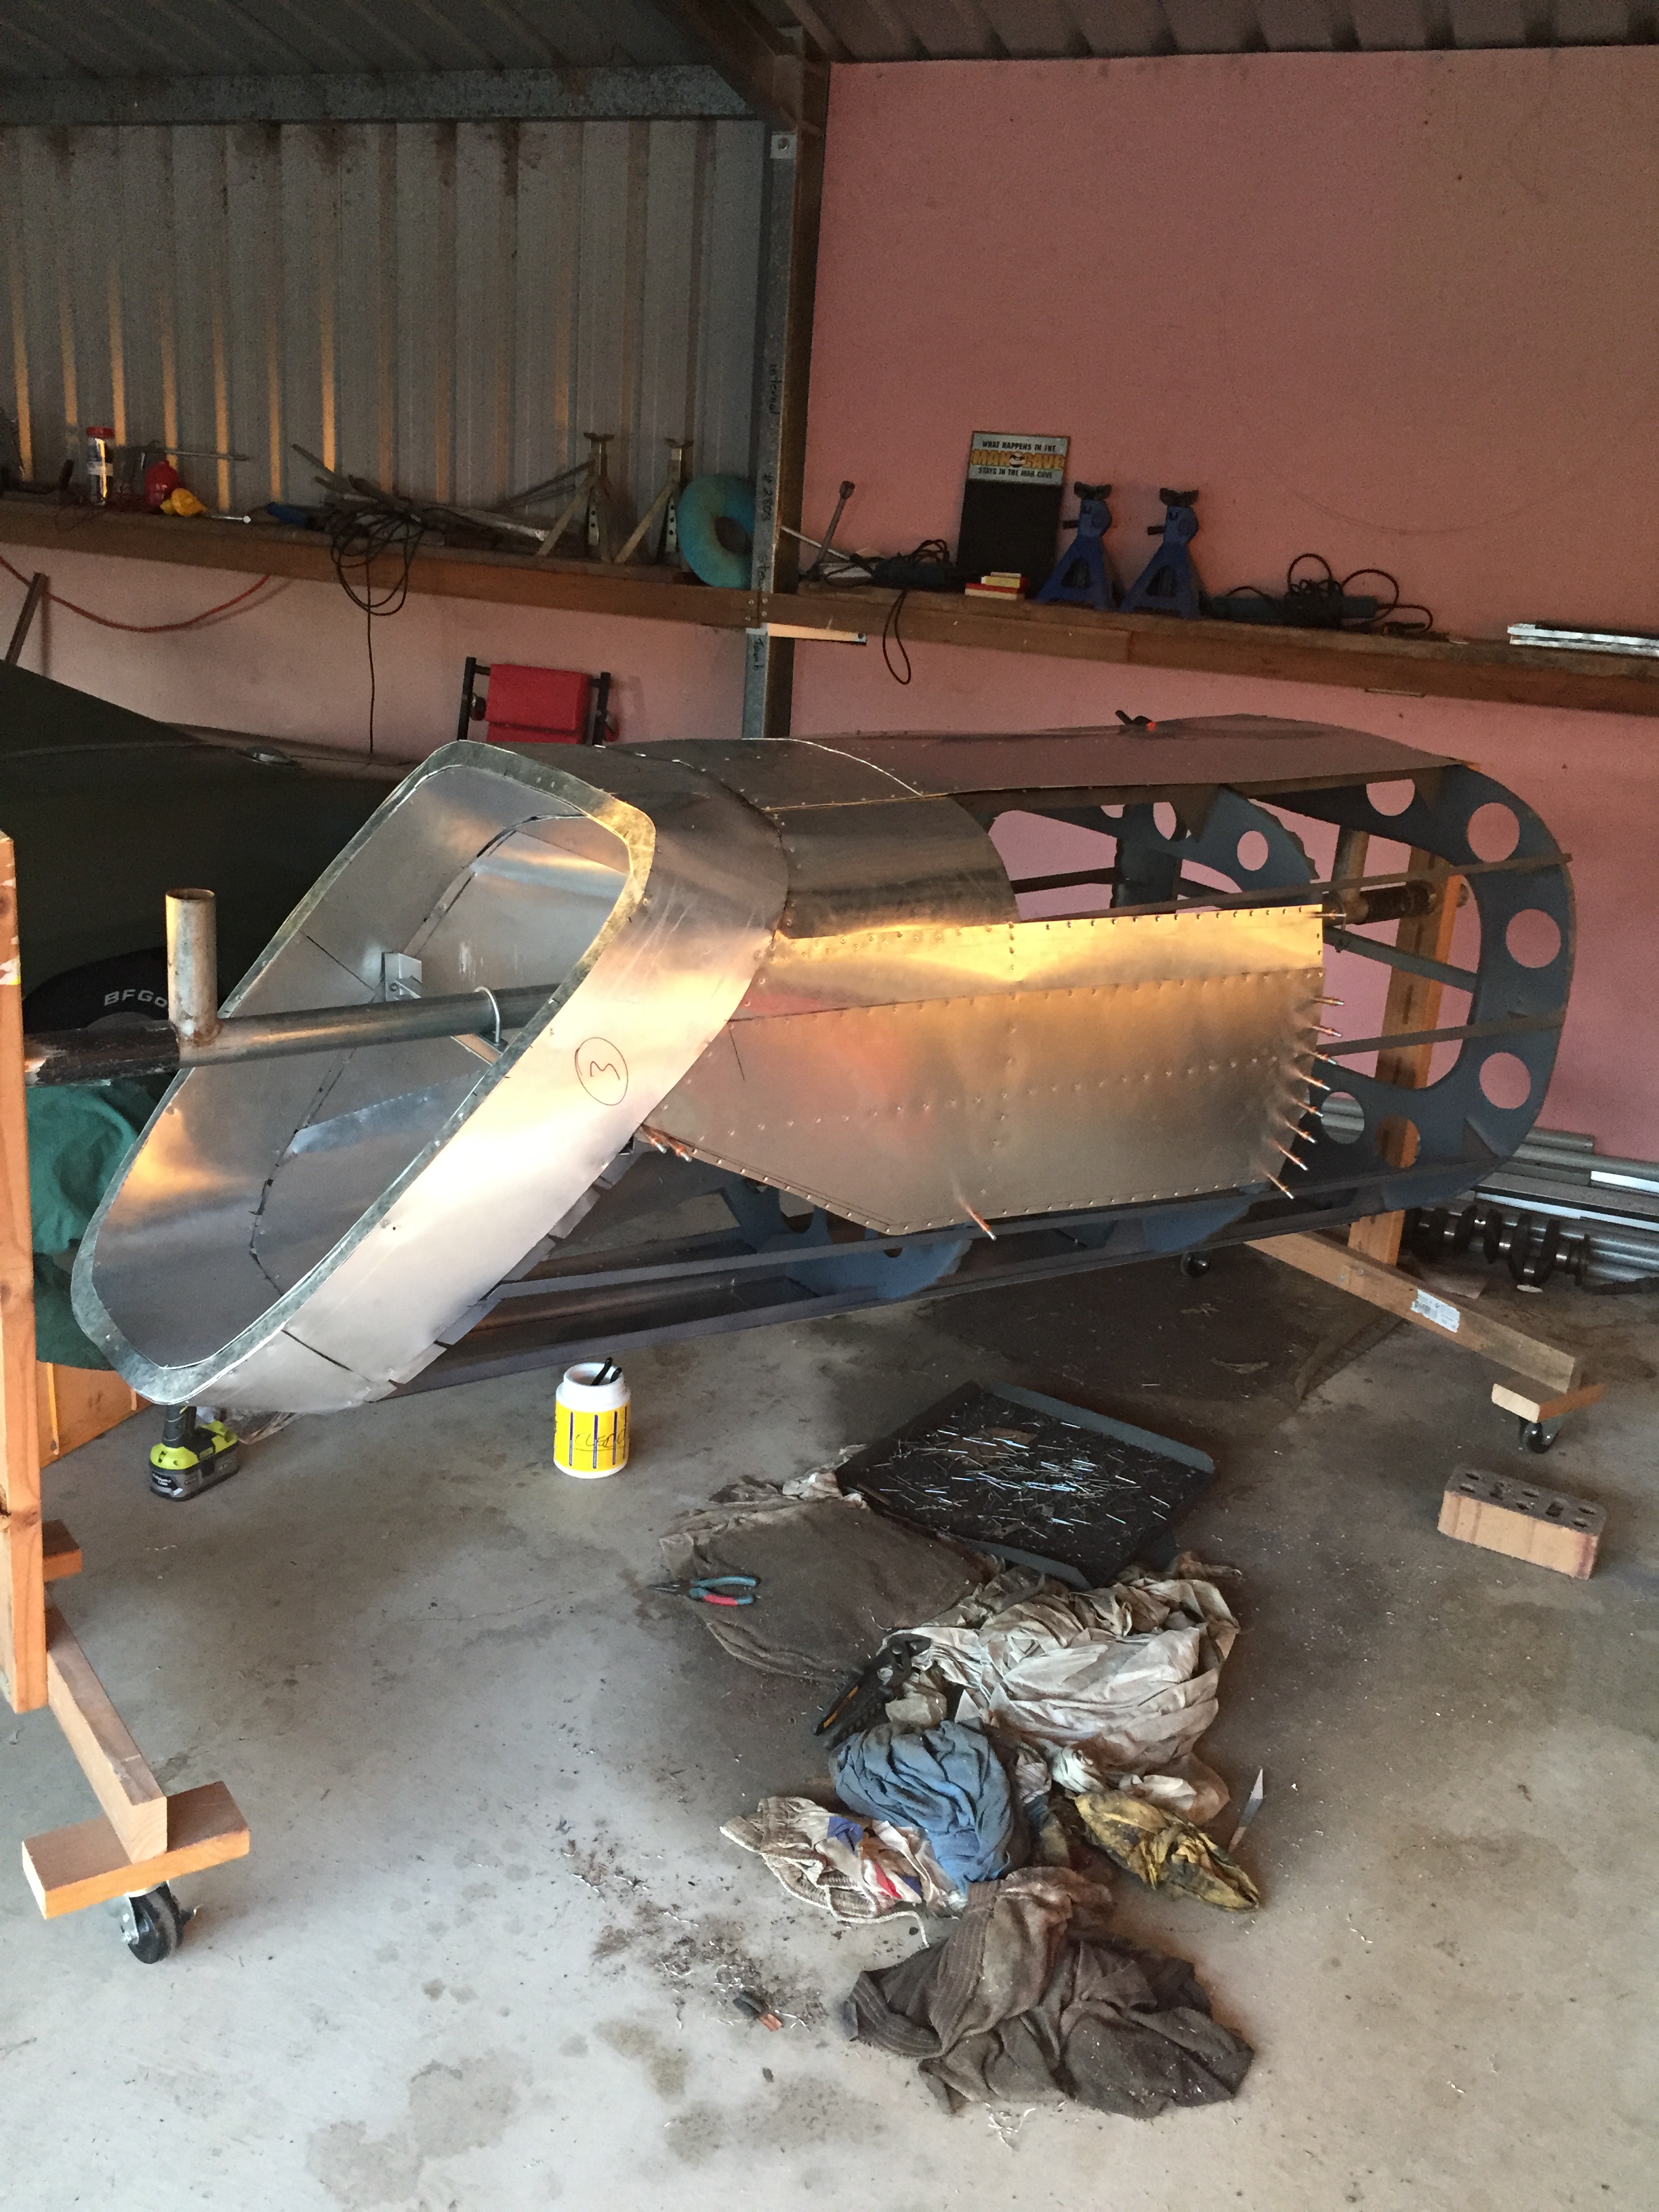


I then begain to design and fabricate the upper panels/skins. I decided I wanted to make one of the panels a compartment door, complete with hinge. This is to give it a practical look and feel, similar to the old warbirds, but also to provide me with internal access to the fuselage.

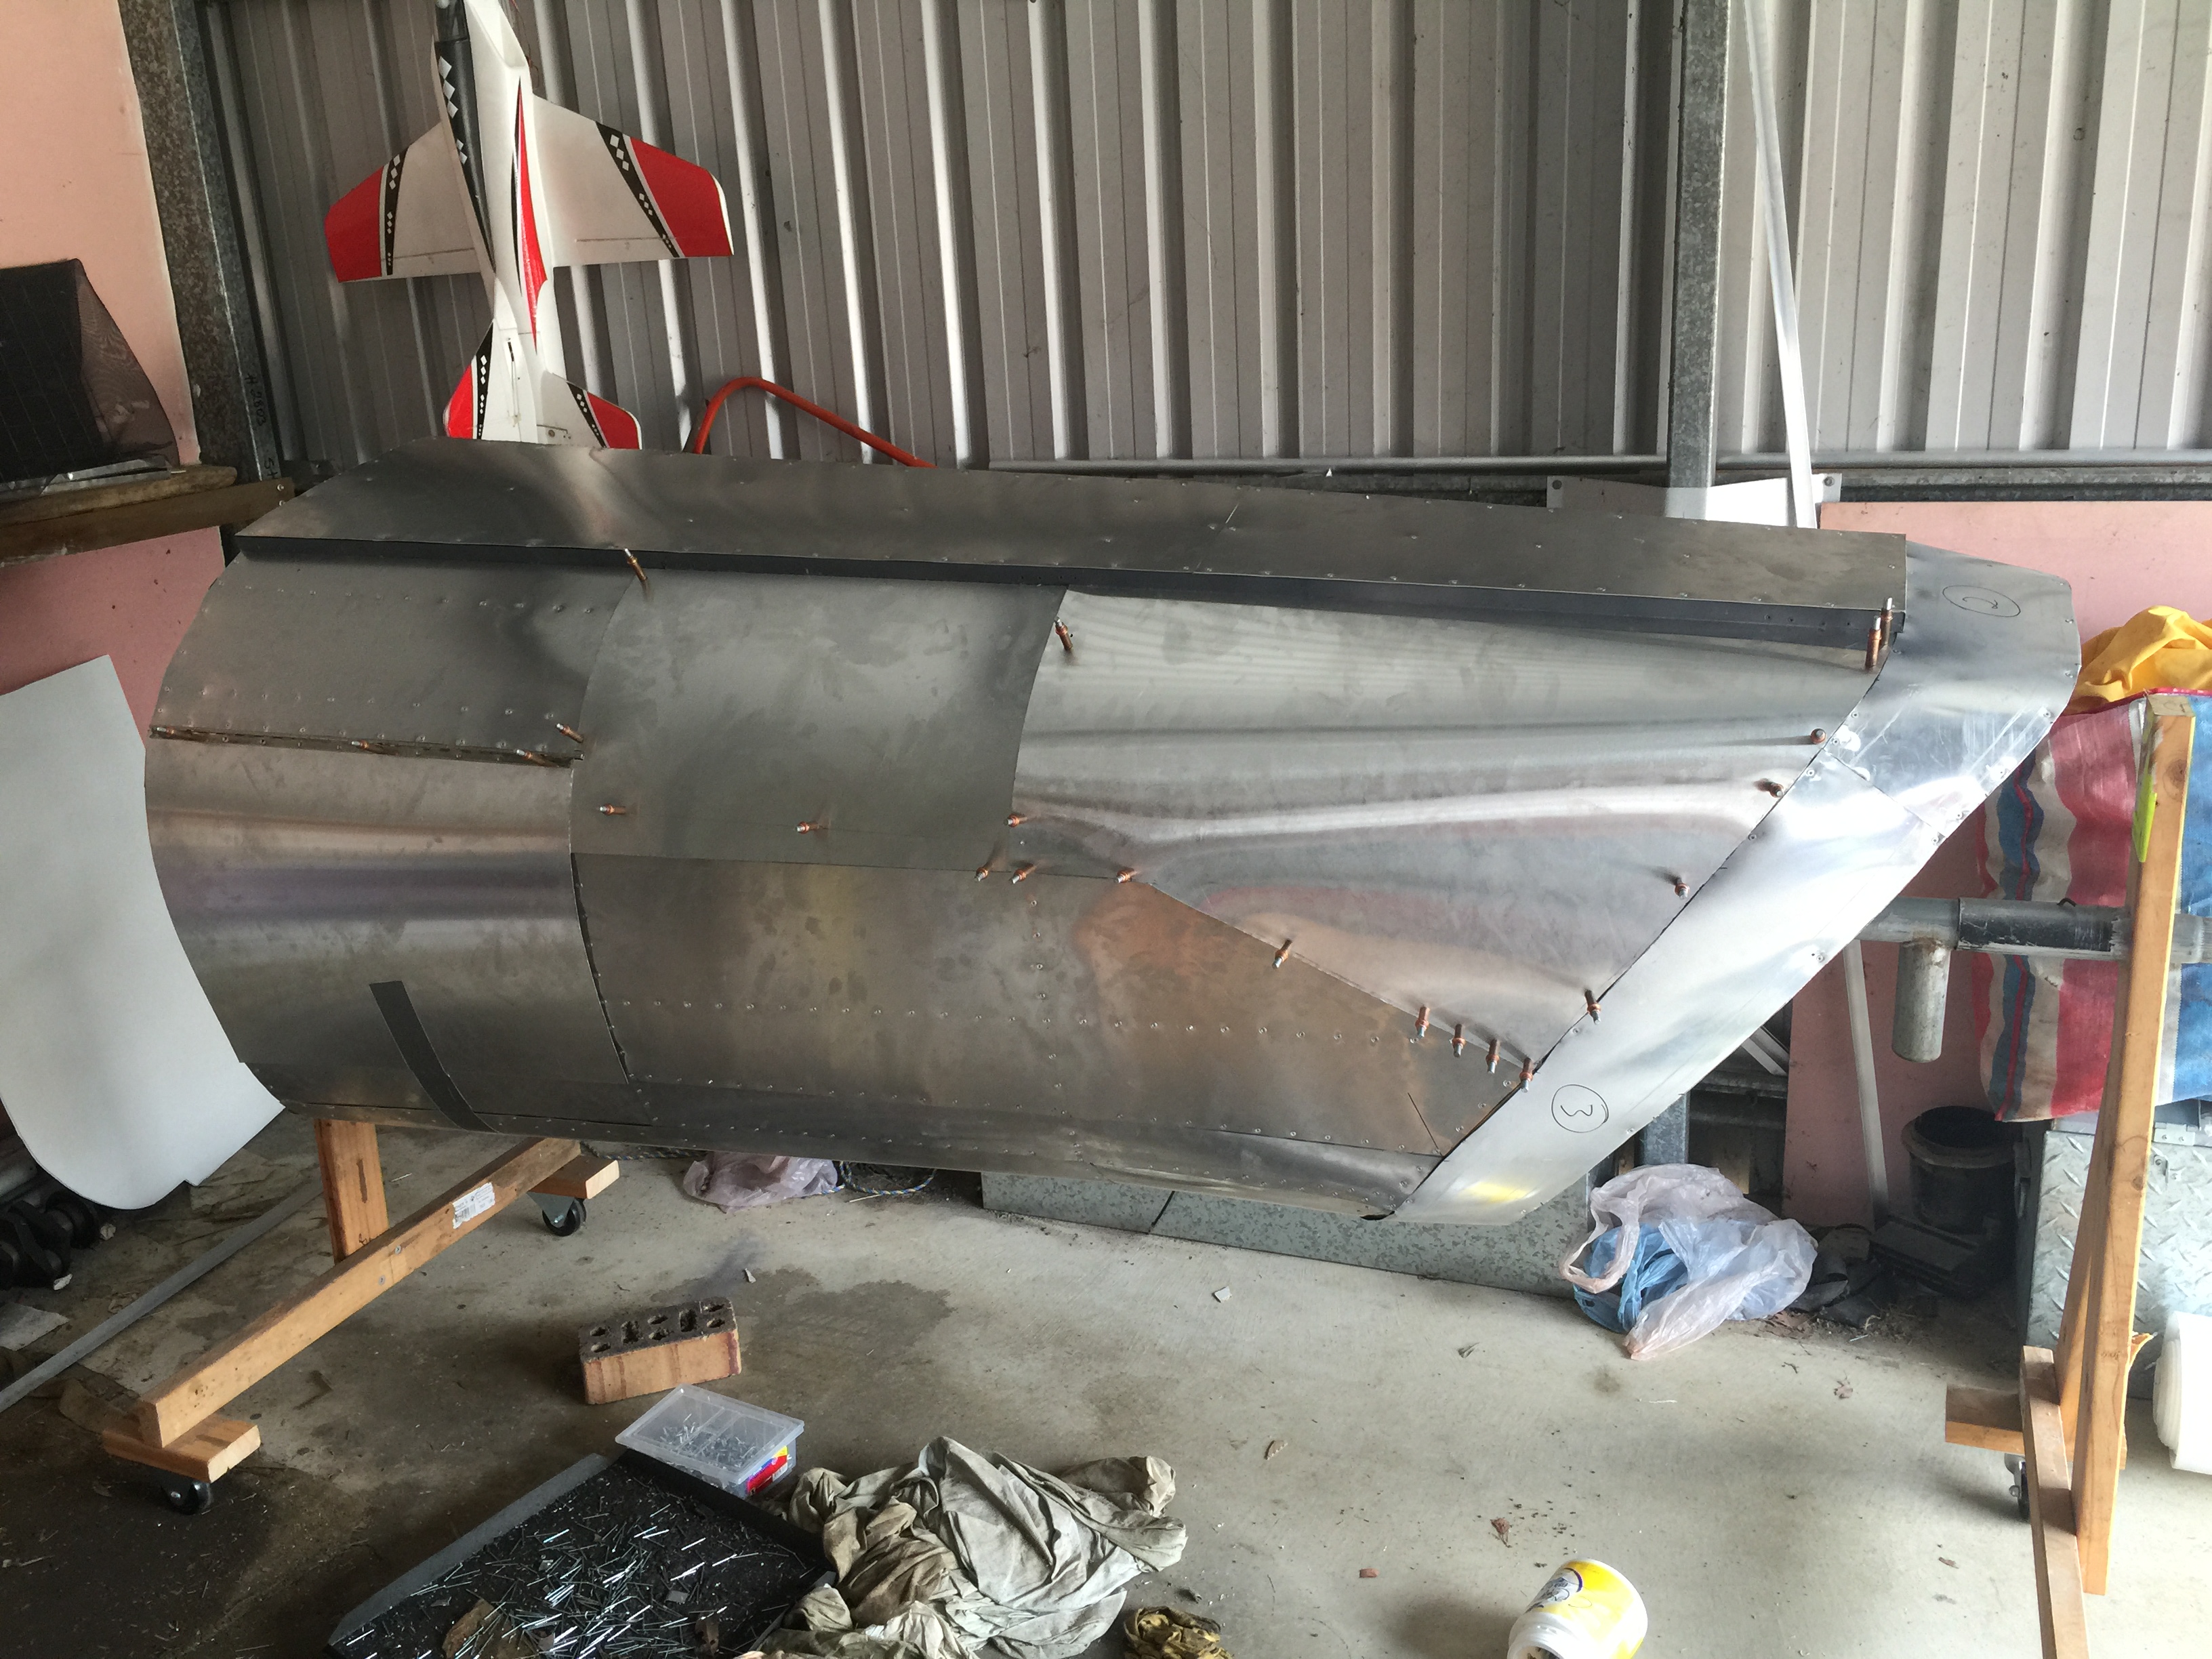


Well there you have it – that’s the story so far. I’m very pleased with the results. Looks like a classic Colonial Viper nose section to me and it looks like it was built using the classic WW2 warbird construction techniques. I’ve yet to finish off the compartment door and then complete the side panelling on the left hand side of the nose. Then it will need filler applied to the countersunk rivets and some unnecessary panel lines, before priming and painting.
From my point of view I’m inspired to continue with the rest of the project. It has validated the design and construction techniques I have used and I know they will work effectively for the rest of the airframe.
I welcome any feedback on the project to date and would like to hear any suggestions people might have.
Until next time…
ColonialViper

I have always wanted to build one…congrats on achieving this marvel.
On the one I wanted to build, I was going to install real engines in mine but the mini-versions so I could taxi it under its own power.
Imagine the calls you would get by the studios and special events to use your viper….
LikeLike
Thanks for looking Dennis. I like your idea about installing mini engines. The sound of 3 mini turbines would be glorious 😀
I’m hoping to be able to transport it on a trailer when finished, but will give that more thought as I progress.
LikeLike
Reblogged this on Deep Space from the Deep South and commented:
What’s in your garage..?
LikeLike
Thanks for looking Darrell – appreciate the reblog!
LikeLiked by 1 person
This is beyond nuts, and it’s something I’ve wanted to do, also, since I was 13 – 36 years ago! I have been building model rockets from scratch, and pretty much all of them flew straight and level like a plane and it was very impressive to see them in flight. I built all sizes, from a small 8-inch model to a 3-1/2-foot, all balsa construction version. That one took 3 D-size motors and soared an incredible distance across the Tucson desert landscape.
My dream was to build a flying version, and I studied Aerospace Engineering at the U of A in Tucson, plus I was an aircraft mechanic in Northern Cal for a few years before taking an Mechanical engineering job here in East Texas. Currently, I am on the back burners of designing a 1/4-scale fiberglass fuselage of the Mk1 and fly it as an r/c model. Then I want to kit it.
What you are doing is outstanding, and I am very eager to learn of your progress. I see you are using Zeus fasteners in your construction. Are you an aircraft mechanic, too? I am very familiar with the construction techniques and from I am seeing from your pics, you’re doing a great job.
Keep us posted, please. And the best of luck completing your project to your liking.
Regards,
Kenneth R. Wyvill, Jr.
East TEXAS
LikeLike
Thanks so much Kenneth, I really appreciate your feedback and encouragement.
It’s fantastic to hear from others who share my passion for aircraft and in particular the Colonial Viper.
It sounds like you have a great deal of aerospace experience, working with some truly classic aircraft.
I think it’s brilliant that you’ve built model and rocket powered versions of the Viper and I very much look forward to seeing your RC version.
I don’t have any real world experience with full size aircraft, apart from a few days work experience at an aviation maintenance firm back in high school. I’ve always been pretty good with my hands, building plastic and balsa models as a kid with a major interest in fuselage construction. I’ve read a lot about aluminium fuselage construction, particularly the WWII warbirds like the Spitfire. I’ve also read up on home built aluminium aircraft and the techniques used to build them.
I’ll have some further blog updates shortly as I’ve made some more design and construction progress over the last few weeks.
Stay tuned and keep in touch.
Thanks and Regards
Scott
LikeLiked by 1 person
Scott,
Thanks for the kind words, as well. I know you’re on the nose section – however, thinking ahead, if this were to be built so it could actually fly, someday, what are your thoughts about building the ship as a Canard-type aircraft, and using Kevlar/Graphite composites to lighten the load? I know canards typically have an external horizontal stab up front to control pitch; however, on my versions I have eliminated the front stab by adding a diverter stabilizer inside the nose intake.. My versions had a rectangular hole right below the stablizer, so the incoming ram air is diverted downward, creating it’s own thrust to keep the nose up, thus, controlling the pitch. The internal stabilizer (or front internal evlon) would be controlled in concert with the rear control surfaces on the ship. Rigging it would be a task, as I haven’t even figured out how I’m going to do that on my r/c version, yet. On a side note, from my experience in my CVR builds, the tail section is a LOT heavier than the nose section, so adding quite a bit of ballast up front would be needed to get the weight and balance correct. Just a thought, and was curious what your ideas are on this.
PS: I will post pictures of my previous build as soon as I figure out how to add pics in here. lol I just joined, so navigating around here is not as turnkey as I had hoped. ttyl
LikeLike
Ken,
Many years ago I built a test balsa glider of the Colonial Viper and I found that a canard was mandatory for it to fly.
The annhedral wings also made it rather unstable, in that it had a tendancy to role over and fly upside down.
I don’t think this is an insurmountable issue as I’ve seen Youtube footage of a depron foam, profile based RC Viper that
apparently flies quite well, but was evidently a handful to control. Possibly in the same way that the F-16 is
inherently unstable.
I totally agree the Viper is naturally tail heavy. My glider experiments always needed plenty of nose weight to get the
centre of gravity right.
I like your idea of an internal stabilizer diverter in the nose. The theory seems logical to me, but I’m certainly
no expert in the mechanics of flight.
You mention the use of graphite composite construction – I had thought about this for my project, but in the end it
was going to be far too expensive for me. If money wasn’t an issue, then composite construction would be the way
to go for sure. Also, given that my project was only ever intended be be a static replica, the weight wasn’t a big
consideration. Well, as long as it can be pushed around on the ground in the same way a light aircraft can be moved
around.
Cheers
LikeLiked by 1 person
Correction: I meant cleco fasteners, not Dzus fasteners. It’s been many years since I’ve worked on aircraft. I learned the technique in school, however my first job was rebuilding/reworking superchargers on old-school WWII aircraft like the DC-3’s F4U Vaught Corsairs, and other aircraft that were powered by radial engines. We specialized in Pratt & Whitney R-1830’s and the R-2800’s – the latter used in the WWII Corsairs, among other fighter craft of that era.
LikeLiked by 1 person
In re to my previous posts, I’ve since uploaded a couple of flying protypes of my Colonial Vipers in my personal blog. I can’t figure out how to post in my replies, unless I had an account that stores my pics online, so anyone following your blog are more than welcome to look at them, there. Thanks. 😊
LikeLike
Great thanks for that Ken, I’ll check out what you’ve been up to. Cheers!
LikeLike